I’ve been a fan and avid reader of PainScience.com for many years. One of the features I’ve long admired on Paul Ingraham’s custom built website are his fantastic footnotes. By clicking on the footnote number, a pop-up is overlayed on the page to display the reference and/or commentary.
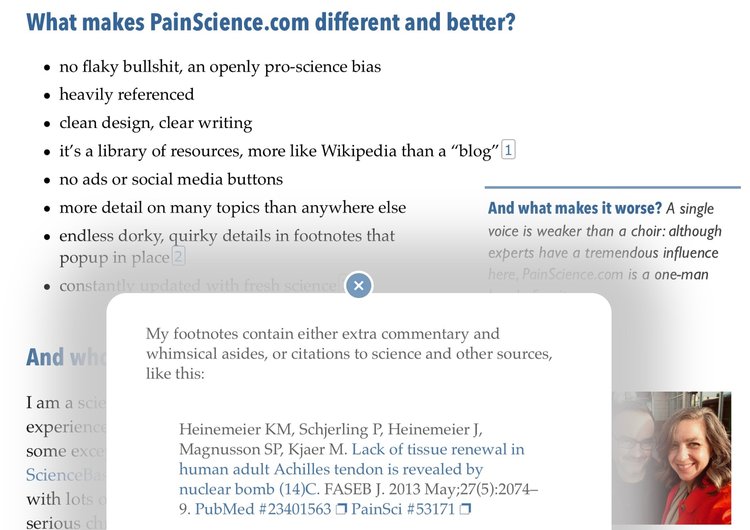
This was by design. As he describes:1
A robust bibliography and “good footnotes” still set PainScience apart in modern online publishing. It’s still rare to see effective footnoting on websites. I have invested heavily over the years in doing it right.
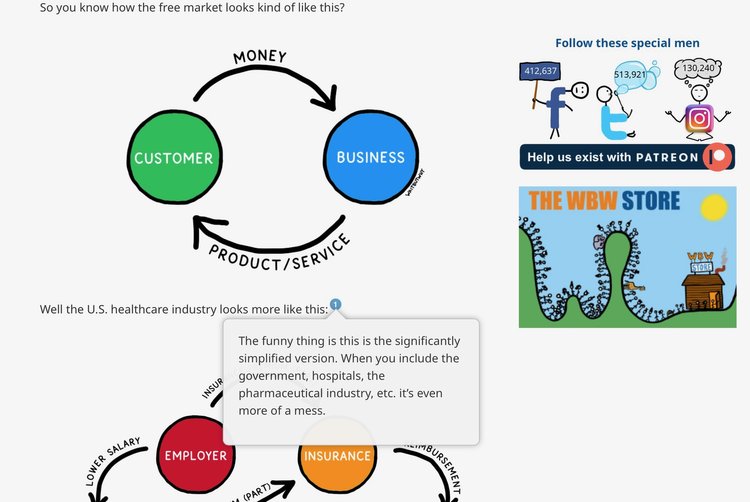
A few years ago, a colleague and acquaintance introduced me to Tim Urban’s Wait, but why? Although he relies much less on footnotes in his writing, the occasional one he does use has a similar feature.
I respect a good footnote because I value referencing the original material. But the problem with most footnotes is that they force you out of the content — you’re whisked way down to the footer where a series of footnotes or references are stacked on top of each other. If you’re lucky, the web designer included a tiny little return arrow at the end of each note which will whisk you right back to the sentence you had just read. That is, if you didn’t get sidetracked by all of the other footnotes or tried to navigate your way back by scrolling repeatedly.
These fancy footnotes on PainScience.com and Wait But Why are helpful because they don’t pull you away from the narrative.
So I just had to have similar footnote setup for writing online. Despite many setbacks, I couldn’t let it go until I could find a way to implement them on my own blog. I searched the web, browsed forums, and inspected page code to find a solution that would get me as close as possible to the examples I’ve mentioned.
I actively manage 5 websites on SquareSpace, so this brief tutorial will cover that hosting and CMS platform. I have tried to use the same set of tools on other platforms–Wordpress, Ghost.org, Wix, etc.–but either I didn’t have any luck, or I just don’t know what I’m doing.2 SquareSpace (with all of its limitations) appears to be the only web hosting platform with enough work arounds to implement this system.3
Enter bigfoot.js
This solution is dependent on an open source package called Bigfoot. Technically, this is a jQuery “plugin” consisting of 3 parts:
bigfoot.cssfilebigfoot.jsfileheader injection code
(If none of this makes sense, be patient; it will hopefully come together soon.)
Essentially, Bigfoot takes your article with footnotes, converts the little numbers into buttons, and tells the browser to display them in a pop-up right where you are in the article.
It does so by relying on a particular set of text formatting rules (syntax) called Markdown… but we’ll get to that in a bit.
bigfoot.css
This Cascading Style Sheet file tells your website what your footnotes should look like. If you have some knowledge of CSS, you could edit this to get the footnotes to look exactly how you want them. I just left this as is.
bigfoot.js
This JavaScript file tells your website how your footnotes should work. There are 3 basic options, all of which you can test out in this nifty demo.
- Default – this option gives you footnotes that are ellipsis in a bubble that popover the text.
- Bottom – this option gives you the same ellipsis, but the note pops up at the bottom of the page.
- Number – instead of the ellipsis, your footnote will be a number in a shaded bubble and the note will open in a popover.
Again, you can customize and combine these options if you know how to code in JavaScript. Or you can play with the demo until you find the combination right for you, and then download that version.
Header injection code
This includes a few lines of HTML code that tell your browser where to find bigfoot.css and bigfoot.js so that it knows how your footnotes should look and act.
Installing Bigfoot on Squarespace
Now, to get it working on Squarespace.
First, you’ll need to download the source files from bigfootjs.com or from GitHub.
Add the plug-in code
We need to upload the CSS and JavaScript files. But, hold on. Squarespace notoriously doesn’t provide any file management.
Aha! But they do… sort of.
You can indeed upload documents, but the feature is buried in the Link builder of a text block. Here’s how I did it.
Create a hidden page
- In your Pages navigator, add a new Not Linked page. Select the Blank page layout. I called mine
plug-inssince this is only to help me add thebigfootfiles. - Add a Text block.
Upload the files
- Add some text that you will create a link with. I just typed
Bigfoot.js. - Select the text, click the Link button, then click the gear icon for more options.
- Select File in the left sidebar, then click Upload File.
- Navigate to the
bigfoot.jsfile you downloaded, click Open. - Once the upload has completed, be sure
bigfoot.jsis selected in the list, then click Save. - Click Apply on the Link builder.
Now, you’ll repeat the same steps, but for bigfoot.css.
- Add
bigfoot.cssas text on a new line. - Select the text, click the Link button, then click the gear icon for more options.
- Select File in the left sidebar, then click Upload File.
- Navigate to the
bigfoot.cssfile you downloaded, click Open. - Once the upload has completed, be sure
bigfoot.cssis selected in the list, then click Save. - Click Apply on the Link builder.
Click Save on the page.
You’ll want to take note of the new location of these two plug-in files, as their path needs to be updated in the header injection code.
Squarespace stores files in the /s directory. As long as you followed the above instructions, the paths should look like this:
bigfoot.js: /s/bigfoot.js
bigfoot.css: /s/bigfoot.css
Right-click each of the text links you just created and then select Copy Link to get the correct path.
Edit the header injection code
Go to your Squarespace Settings. Select Advanced. Select Code Injection.
Inside the HEADER box, paste the following code:
<!-- jQuery for Bigfoot.js -->
<script src="//ajax.googleapis.com/ajax/libs/jquery/2.2.1/jquery.min.js" ></script>
<script type="text/javascript" src="/s/bigfoot.js"></script>
<link rel="stylesheet" type="text/css" href="/s/bigfoot.css">
<script type="text/javascript">
  $.bigfoot();
</script>
<!-- End bigfoot.js -->
Note: If the URL of your plug-in files is different, you’ll want to replace it for /s/bigfoot.js and /s/bigfoot.css respectively. e.g. if you opted for the footnotes as numbers, your 4th line may read:
<link rel="stylesheet" type="text/css" href="/s/bigfoot-number.css">
Click Save at the top left.
Congratulations! You’ve installed the Bigfoot plug-in on Squarespace.
So… now what?
Creating footnotes in Markdown
Markdown is a plaintext formatting syntax that works across document types and in many different apps. Created by John Gruber, it has quickly grown in popularity as a way to write richly formatted text without having to take your hands away from your keyboard–and, more importantly, your mind away from the text.
Instead of typing a heading, reaching for your mouse, selecting Edit->Bold then adjusting the font size, Markdown lets you format a heading with just a few keystrokes.
The # symbol is used to denote a header, with multiple ##’s corresponding to subheadings. i.e. the Markdown:
# This is a main header (H1)
## This is a second header (H2)
### This is a third header (H3)
Would be formatted like this:
This is a main header (H1)
This is a second header (H2)
This is a third header (H3)
The syntax for a footnote is slightly more complicated, but still quite easy once you get used to it.
To denote the footnote, use a bracket followed by a carrot followed by the footnote number, and then a closed bracket. i.e.:
I'll include the first footnote at the end of this sentence.[^1]
Would mean footnote number 1, and would appear like this:
I’ll include the first footnote at the end of this sentence.4
But that footnote needs to reference something. So to add the actual text to the footnote, use the same bracket-carrot-number-bracket syntax, followed by a colon, like this:
[^1]: This is the note that is referenced by footnote #1.
By convention, the footnote text goes at the end of the document, i.e. where your endnotes or bibliography might appear. But, in your Markdown file, they can go anywhere you want them to be – at the end of each paragraph, or perhaps even at the top? When viewed in formatted text, or in HTML on a webpage, they will all be placed inside the pop-ups.
For simpler syntax, you can also just type the footnote text right in the brackets, like so:
I'll include the first footnote at the end of this sentence.[^This is the note that is referenced by footnote #1.]
More details and explanations about Markdown, including footnotes, can be found at the MarkdownGuide.org.
Adding Markdown to blog posts on Squarespace
The problem you’ll run into is that Bigfoot requires extended Markdown syntax, while Squarespace only supports the standard syntax.
The work around? Export your Markdown to HTML.
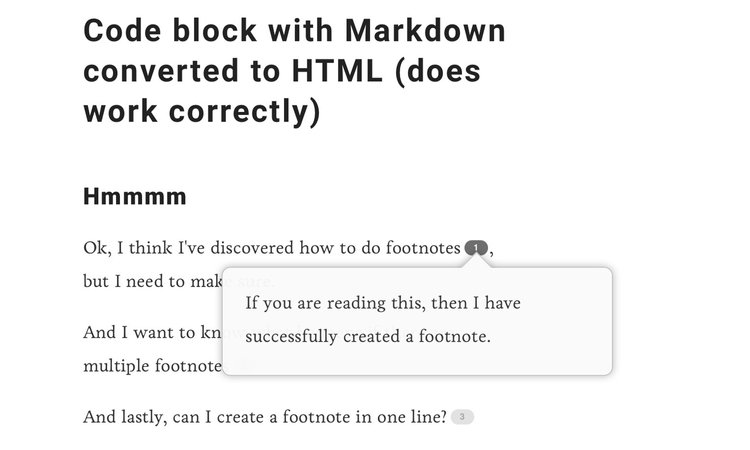
This is quite easy with the writing app I use (iA Writer), because I can copy the entire document to HTML with a single keystroke5 and then paste the HTML into a Code block on Squarespace.
Save the block, save the page, then refresh and, voila, the footnotes will appear in all their splendid glory.
One caveat to this method is that Code blocks cannot be easily split like Text or Markdown blocks can. So if you want to add an image or a pullquote or some other element in between paragraphs, you’ll actually have to breakup the HTML code for the paragraphs that follow into another Code block. The good news is that Bigfoot is smart enough to find footnotes on the page, not just inside the same block. So if you mark a footnote 1 in one Code block, add an image, and then include the HTML for the reference to footnote 1 in a second Code block at the bottom of the page, the footnote will work as expected, i.e. the reference text will show up in a pretty, pop-up footnote right where you want it, in the first paragraph.
Update
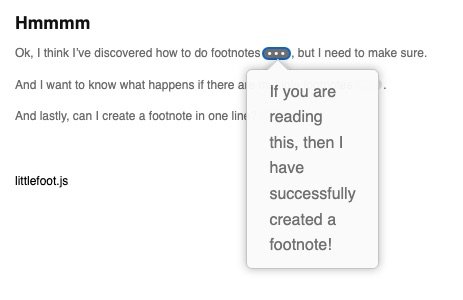
Littlefoot.js
After writing this walkthrough,6 I discovered a slightly more modern and simpler to install piece of code called Littlefoot. It is still JavaScript, but it doesn’t require jQuery7 and also doesn’t require uploading the JavaScript and CSS files.8
To install Littlefoot.js, simply copy and paste this code to the Footer Injection Code under Advanced Settings in your Squarespace dashboard.
<!-- Littlefoot.js -->
<script
  src="https://unpkg.com/littlefoot/dist/littlefoot.js"
  type="application/javascript"
</script>
<link rel="stylesheet" type="text/css" href="https://unpkg.com/littlefoot/dist/littlefoot.css">
<script type="application/javascript">
  littlefoot.default()
</script>
<!-- End Littlefoot.js -->
Of course, you’ll still have to write your post in Markdown and copy and paste as HTML as described above.
The only limitation with Littlefoot compared to Bigfoot is that I haven’t quite figured out how to get numbered references working instead of the default ellipses9. It’s definitely possible, but it requires changing some code in the JavaScript file (and therefore also requires uploading the custom file to Squarespace) and I haven’t learned enough JavaScript and CSS to implement it to the same level as Bigfoot.10
Update 2
I wrote this tutorial over a month ago but, wouldn’t you know it, as soon as I hit ‘Publish’ the fancy footnotes stopped working on just this post. It’s taken weeks of reposting, re-formatting, much trial and error to discover the bug… including ‘footnote’ as a tag on the post. 🤦🏻♂️🙄
Yet another reason it’s likely time for me to move on to Littlefoot.js.
I also acknowledge that this is in many ways a poor example of how to (over)use footnotes. It demonstrates the feature and is a small victory over HTML and JavaScript code for me, but footnotes should be used more sparingly than I show here.
As Cormac McCarthy says, “Avoid footnotes because they break the flow of thoughts and send your eyes darting back and forth while your hands are turning pages or clicking on links.”
Bigfoot.js just solves part of the problem.
-
Of course, even this quote has footnotes on the original page describing his insanely engineered bibliographic system for references: The Pain & Therapy Bibliography ↩︎
-
Hint: I don’t know what I’m doing. ↩︎
-
This walkthrough is heavily based on older blog posts by Anthony Craig and Stephen Hackett explaining how they got Bigfoot.js working on their Squarespace sites. Curiously, both of these bloggers, and the more well known bloggers they reference, no longer appear to use Bigfoot-style footnotes. I’m late to the trend. ↩︎
-
This is the note that is referenced by footnote #1. ↩︎
-
CMD + Shift + C ↩︎
-
and in fits of tech boredom and wanting something a little more streamlined than the requisite copying and pasting of HTML to Squarespace ↩︎
-
which is apparently going out of favor? Or maybe just out of style? ↩︎
-
Instead, it references the JavaScript and CSS on a CDN (content delivery network, i.e. someone else’s server), which could actually work with Bigfoot as well, if you know a public listing of it on a CDN. ↩︎
-
a.k.a. the three dots ↩︎
-
If you know how–or more accurately, where–to edit the
buttonTemplatecode to get numbered footnotes working, please let me know! ↩︎
Make Your Own
If you’d like to get your own SquareSpace site to start writing with elegant footnotes, get a free-trial using my affiliate link.